WI.RED February Meeting – We Love To Get Crafty!

20140226-213919.jpg


It doesn’t seem like two minutes ago I was sitting down to write the WI.RED January blog post, and here I am, onto Febrauary already! For those of you who have recently started reading this blog, I’m part of my local Women’s Institute. You can see our Facebook page here or email hellowired@yahoo.co.uk for more information. I write a post about our meetings every month.

So, onto February!

At our WI we have a cake rota where 3-4 people every meeting make or bring something for us to sell with the teas and coffees. This month was my turn, and after a bit of deliberating (Argh! What do you take to the WI?!) I made some chocolate cupcakes with Nutella buttercream icing (recipe coming soon). We also had some Lady Grey Tea Cookies, Gingernut Tiffin and Shortbread. Yuuummmmmm.

We had a full house with lots of our members attending, plus a few guests. Back in October, we ran a competition to use a paper plate to make the most creative item. One of our members, Tia, made the most amazing flower brooch. This month she very kindly agreed to show us all how to do it. I chose a baby pink paper plate and decorated it with a grey and white polka dot ribbon… I have to confess Tia did help me quite a bit as I’m not the most patient or creative person! The ladies all got crafty and we had some very impressive efforts – see the pictures below.

Here’s a step-by-step on how to make the brooches.

— Take your paper plate and cut the rim off – this is the bit you’ll be using. You want one end to be thicker than the other, so start about 3cm in and gradually reduce it to around 1cm. For smaller flowers, use half the paper plate only.

— Start to make incisions vertically along the rim. At the 3cm end, make these about 2cm apart and 2cm down. As the rim gets thinner, make more and more incisions, until near the end they are abut 1/2cm apart. Now for the fiddly bit. Using scissors or a craft knife, shape each part into rounded ends, to make the petals – see the pictures if you’re unsure. Do this to every part of the rim.

— Wrap the plate around your fingers a few times to loosen the paper and make it more malleable.

— Take each petal and roll it outwards (so if the colour is facing you, roll it away from you), to make them more petal-like. If you don’t do this, the petals will stick upright and it won’t look right. You’ll see what I mean once you start doing it. Keep playing with them until they’re all rolled nicely.

— Starting from the smallest end, roll inwards so that the colour is on the inside. Roll the whole thing in on itself until it looks like a flower. I found that it looked best when I rolled it really tightly, then let go slightly so it loosened a little. Using a glue gun, glue the end flap onto the flower to secure it.

— That’s your flower done. You’re now free to use your imagination decorating it to make it look lovely!

I don’t think mine was great to be honest, but I’m not the best at things like this!

I can’t wait for next month’s meeting – a talk on Permaculture. For those of you who don’t know, Permaculture is a way of gardening with the minimum of effort – planting things which work well together and so on. I’m not at all green fingered, but am always interested in learning about new things so I I’m very much looking forward to it!

20140226-213939.jpg20140226-213949.jpg20140226-214212.jpg20140226-214237.jpg20140226-214248.jpg

20140226-214302.jpg

20140226-214339.jpg

20140226-214355.jpg

20140226-214415.jpg

20140226-214433.jpg


Let’s Stay Together – WI. RED January Meeting

20140121-211712.jpg

I approached this month’s WI. RED meeting with interest. The plan was to have motivational and inspirational speech from Denise Neale Gordon, a relationship coach, followed by an input from One Billion Rising, a worldwide charity working together to end violence against women and girls.

Although I’m getting married this year and am very happy in my relationship, I thought that hearing from an expert couldn’t do any harm! Denise started off telling us her story, about how her marriage almost broke down years ago, and what she did to repair and improve it.

Her core message was: Learn about what your partner needs, and provide it!

I think a few people may have found this to possibly be a little traditional, and all about just pleasing the man, but I think I understood what Denise was trying to say. Essentially, we should treat people in the way we would like to be treated; with respect, fairness and compromise. Find out what your partner wants, and try to provide it for them. By doing something nice, maybe they will be happier and in turn do something nice for you, whether that be just making more of an effort, hoovering the house or telling you that you look nice! The message I got was that it’s all a circle. In a way, like karma. Send something good out and good will return.

Something else which stuck in my head was a comment another member made. She said that we think about the ways in which WE would like to be shown love, and then act in these ways, or do these things for our partners, trying to show them that we love them. But the way in which WE want to be loved may be different to how our partners may want to be treated. So, for example, if he took me out for a nice meal as a surprise and treated me, I would love that and it would be one way for him to show me that he loves me. But he’s not that bothered about going for meals, and maybe he would prefer for me to cook him a nice meal; that would mean more to him and show him that I love him.

So, in essence, don’t just ASSUME you know what your partner wants, ASK them!

We also had some ladies from Bristol Rise, the Bristol branch of One Billion Rising, who are a world-wide charity, working together to end violence towards women and girls. They talked to us for a while about their work and fundraising and told us about a march which will be taking place in Bristol on 14th February 2013, where there will be an organised dance/flash mob to raise awareness for the cause. You can find out more about them

We had some lovely treats on the tea and cake stall, including stollen bites and the perfect Lemon Drizzle Cake, both made by two of our committee members, and a fabulous Cappuccino Cake, which was made by Ceri Dunning, one of our members. She couldn’t make the meeting itself but trekked out in the dark and the rain to give us her cake! What a fab lady.

As of next month, we will have a new temporary WI President, Nikki Buglass, as Louise will be off, hopefully having had her baby!

Next month’s meeting will have a paper craft theme, where we will be learning to make flowers out of paper plates. I’ve seen these before and can’t wait to give them a go – think Pinterest, weddings, shabby chic!

If you’d like to know more about our WI or how to join, you can look at the Facebook page or email us at hellowired@yahoo.co.uk.

Until next month, ladies!

x

20140121-211736.jpg

20140121-211749.jpg

20140121-211804.jpg

20140121-211820.jpg

20140121-211829.jpg

20140121-211843.jpg

O, Christmas Tree!

This evening I thought I’d share with you our 2013 Christmas decorations. We moved into our new cottage a few months ago and are slowly working through each room, decorating it to our style. I’m sure there will be many more posts to come about that!

One of the rooms we are almost done with is our living room and we’re just putting together the finishing touches. We have painted one wall a golden mustard colour and the rest of the walls are a pale grey.

Most years we buy a real Christmas tree. But as lovely as they are, we found that spending £50 a time for a real tree wasn’t very economical. So we did a bit of research and found the Eiger Christmas tree from B&Q. It’s 7ft 6 so you need a decent height ceiling. The tree is a very realistic colour and the branches are in proportion and look even. There are different shades of green and textures within it to make it look a little more realistic.

The Eiger tree has a nice, sturdy base and is easy peasy to put together. It’s also great to store – this is our second year of using it and it’s just as good this year as last!

Even better, it’s currently on offer with 40% off – it’s normally £70 and is reduced to only £40!! Snap it up quick, it’s a fab deal. Find it at the link below:

http://www.diy.com/nav/christmas/christmas-trees/classic_trees/7ft-6in-Eiger-Christmas-tree-12959170?skuId=13469876

20131203-085828.jpg

This year we have gone for a pink and silver theme. We used soft white fairy lights around the tree (we needed two packs as it’s a fair sized tree!), then used various pink, silver and clear baubles and decorations. My favourites are probably the multicoloured spotty baubles or the crystal drops (these were a bargain from Asda last year – check out their range this year too as they are really reasonable).

http://m.direct.asda.com/on/demandware.store/Sites-ASDA-Site/default/Search-Show?cgid=AD050904

20131202-213937.jpg

20131202-213910.jpg

20131202-213902.jpg

20131202-213852.jpg

I also had to add some of the Lindt Christmas tree chocolates which Mike treated me to yesterday – these must be the best Christmas chocolates ever!!

20131202-214347.jpg

I love to have lots of fairy lights around, so hooked them around the picture frame. I think these look so pretty, what do you think?

20131202-214731.jpg

To finish it off we added our cheeky, happy, stuffed reindeer who has seen us through a few Christmases now. Lola our bulldog is desperate to eat him up!

20131202-214451.jpg

All that was left was to pop on our nice warm log fire and prepare to feel festive… Perfect.

20131202-214621.jpg

The countdown has begun!

How have you decorated your home?

Caramel Cupcakes Pop KitchenAid Cherry

So excited was I to use my new toy (see my previous post about my new KitchenAid), I hot-footed it down to my local supermarket and stocked up on baking supplies in preparation for a mammoth session.

I searched through all of my recipe books looking for the perfect recipe to test out and decided on some yummy caramel cupcakes. I’d never made these before so just had to give them a go!

I also had some posh purple cupcake cases which I had for a Christmas present last year (!) which I hadn’t got round to using yet. I kept waiting for a special occasion, and what better than this.

20131130-132319.jpg

They are from the Bath Cake Company on Lansdown Road in Bath, a fantastic little find well worth taking the short walk out of the centre to peruse their shelves. Not only do they sell an abundance of baking supplies, but you can also treat yourself to some freshly baked cakes as well!! Om nom nom.

You can check them out here: http://www.bathcakecompany.co.uk/

Anyway, onto the recipe.

Ingredients

Cake

175g butter, softened

175g light muscovado sugar

2 large eggs, lightly beaten

175g self-raising flour

2 tbsp milk

Frosting

397g can Nestle Carnation Caramel

200g tub soft/cream cheese

100g salted butter, softened

450g icing sugar

Method

— Heat oven to 180 degrees and pop your cupcake cases into a muffin tin. This recipe should make about 12 cupcakes.

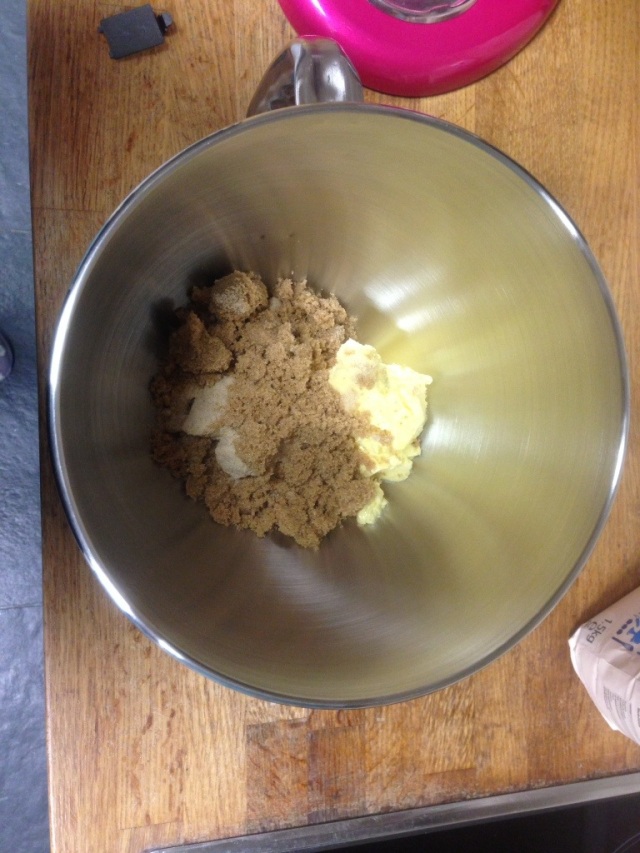
— Cream the butter and sugar in a bowl. I used the KitchenAid on level 2, rising to 4 and then 6. Beat until soft and pale. Add a handful of the flour to stop the mixture from curdling, then with the mixer still going, add a little of the eggs at a time.

20131130-132444.jpg

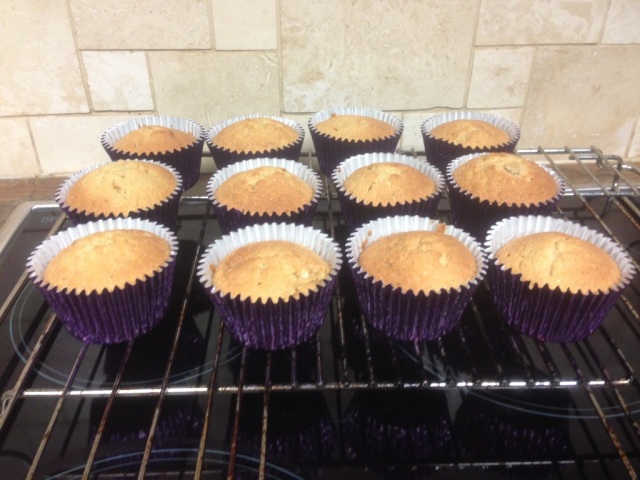
— Next fold in the flour and milk until fully incorporated. Divide the mixture between the cases (fill them up to about two thirds full) and bake for approximately 18 minutes (the exact amount of time will depend on your oven – check them after 15 minutes). The cakes should be golden brown and spring when you touch them. Leave to cool fully.

20131130-132550.jpg

— Mix half of the can of caramel with the cheese, butter and icing sugar with your stand mixer or electric whisk. **TIP – Cover your stand mixture bowl with a tea towel or your kitchen may end up looking like it’s snowed… Like mine did!!)**

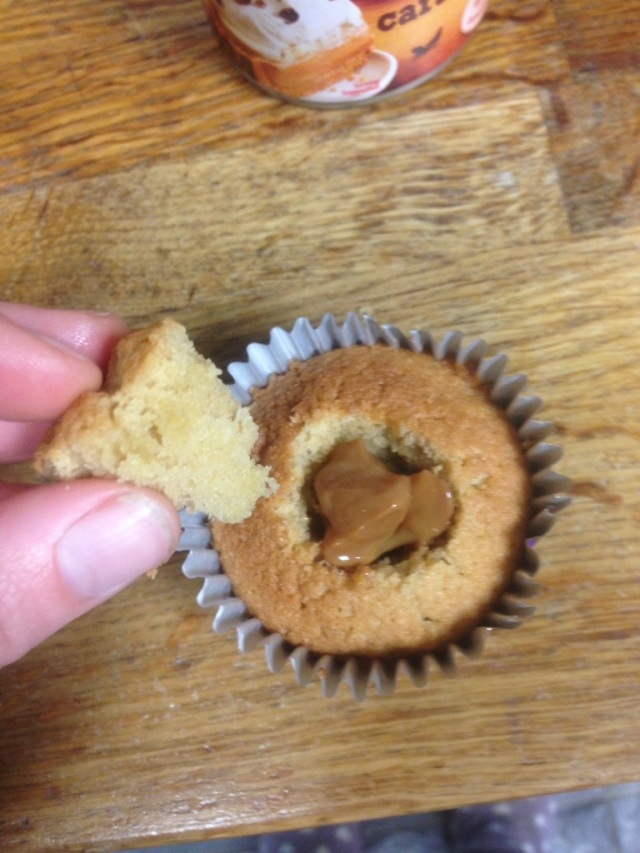
— Chill in the fridge. Meanwhile, cut a small section out of each cupcake using a knife and drop a half-teaspoon of caramel into each one. Put the cut bit of cake back on top.

20131130-132853.jpg

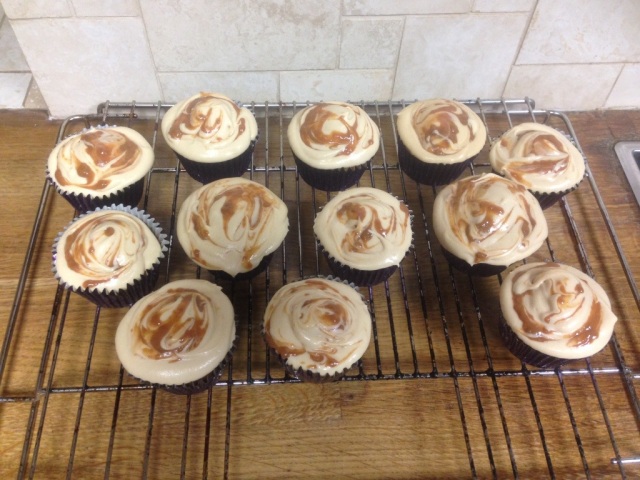
— Ice your cupcake with the frosting however you want! I used a Wilton 1A piping nozzle, the big round one, and a disposable piping bag.

— I had some caramel left over, so I dropped spots of it onto the frosting, and swirled it with a skewer to make a nice pattern.

20131130-132627.jpg

— Make yourself a nice cup of tea and feel smug 😀 Then eat a cupcake and feel slightly sick!

NOTE! I found with the original amount of icing sugar that the frosting was far too runny so added some more sugar to the mix. Although the cupcakes were delicious, they were VERY sweet and you definitely couldn’t have more than one! (Probably a good thing). Next time I will add a few flakes of sea salt to balance the flavours out a little… And who doesn’t like salted caramel?!

Also – this makes a LOT of caramel frosting so I have a load left over which I have put in the fridge and now need to bake something else to use it up! Any suggestions? Have any of you tried this recipe? I’d love to hear how you got on!

The Debut

So… Here it is! My first ever, nervously typed, blog post.

I’m not quite sure what I’m doing or whether I’m doing it right, so please be patient and kind (and feel free to leave comments and give me advice – I’ll need it for sure!).

A little about me – I’m 27 and live with my fiancé in Bristol. I love baking (although sometimes have more disasters than successes), my bulldog and eating nice food. I dislike bad grammar and being cold!

This blog will mostly be recipes, baking and craft, with a few beauty reviews thrown in for good measure. I’m also getting married in 2014… A right old list of things to blog about then!

My lovely fiancé has just bought me a (drumroll…) bright pink Kitchenaid – yay for me! So standby for lots of cake related blogs coming soon.

Until then, thanks for reading and I hope you stick around for more.

20131128-184904.jpg