Cadbury’s Creme Egg Brownies – Much Requested Recipe!

20140131-111941.jpg

I’ve got a bit of a back-log going on. I’ve made quite a lot of things which I am planning on giving you the recipes for, and this particluar bake is way down the list chronologically.

But since I made it, I’ve had SO many people asking for the recipe, I had no other option but to bump it up the list!

This Creme Egg Brownie recipe has been doing the rounds on Facebook for the last couple of weeks, and was brought to my attention when my cousin messaged me the link with the message “Saw this and thought it’d be something you would rock at making!”. That was it. The same day, I was in our local supermarket, buying any ingredients that I didn’t already have.

Although there are a fair amout of ingredients, I was quite happy to see there was nothing really out of the ordinary, and apart from the creme eggs I had almost everything in my baking drawer already.

So I got to baking. I can’t tell you how excited I was by these, and I think my friends were, from the reaction I had on Facebook and Instagram! By the way, if you would like to follow me on Instagram just search for me under meow_2u.

Once these were done, I just had to try them out, and OMG they were pretty amazing. They are described as a brownie, but I would probably say the bottom layer isย a cross between a cookie and a brownie. They’re to die for, either way.

This recipe is adapted from the recipe which was going round Facebook. It was originally posted by Scarletscorchdroppers, but I, as usual, felt the need to tweak it a little.

**WARNING** – These are the most yummy, sickly, sweet brownies you may ever consume. You’ll eat one and say to yourself “That was so sweet, I couldn’t possibly eat another”… And fifteen minutes later you’ll be back having another. Just don’t blame me if you put on weight, that’s all I’m saying ๐Ÿ˜‰

Ingredients

For the brownies

175g dark chocolate, broken into pieces

110g butter

85g plain flour

2 tbsp cocoa

140g caster sugar

1 tsp vanilla extract

2 medium eggs (I used 3 small eggs), beaten lightly

One bag of mini Creme Eggs (8 eggs)

For the creme layer

85g golden syrup

2tbsp butter

1/2 tsp vanilla extract

170g icing sugar, sifted

For the chocolate layer

100g milk chocolate, broken into pieces

30g butterย 

Method

— Preheat the oven to 180 degrees Celsius. Grease and line a baking tin. I used a silicone square 20cm x 20cm tin, but use whatever you have, as long as the sides aren’t too low. You’ll have a few layers to build up!

— Make the brownie layer. In a pan, gently melt the dark chocolate and butter. You could do this in a bain marie as well, or the microwave. Just be careful to keep a really close eye on it and keep stirring it, otherwise it’ll burn. Once they’re melted, take off the heat and leave to cool a little.

— Chop the mini Creme Eggs in half. They have a natural seam in the middle so it’s easiest (and cleanest!) to cut along here. Try not to crack the egg, and to preserve as much of the inside of the eggs as possible.

— Place the flour, cocoa, caster sugar, vanilla extract and eggs into another bowl and combine. Add the cooled chocolate/butter mixture and give a stir. Turn out into your prepared tin. Place the creme eggs face up into the brownie mixture – I did four rows of four. That way when the other layers go on top and you come to cut them you’ll have an idea of where the eggs are hiding. The idea is to get a half-egg in each slice of brownie. Bake in the oven for around 25 minutes, then leave to cool completely in the pan.

— Make the creme layer. I used my KitchenAid for this part, although you can easily do it by hand. Put the golden syrup, softened butter and vanilla in a bowl and beat together on a medium speed until combined. *TIP* – When measuring the golden syrup, coat a spoon in oil and scoop the syrup out of the can. The oil will allow the syrup to slip easily off and not stick.

— Slowly add the icing sugar, and continue to mix until it’s creamy. Add a drop of milk if the mixture is too firm; it should be easy to spread but firm enough to hold its shape. Spread the creme layer on top of the cooled brownie and pop it in the fridge to chill for at least an hour.

— Make the chocolate layer. I did this in a bain marie. Place a bowl over a pan of simmering water, and put in the milk chocolate and butter. Melt them together, leave to cool a little, then spread over the chilled creme layer. Put it back in the fridge for a bit.

Cut into 16 squares. I couldn’t resist and had to try out a piece almost immediately. I have no patience. Or willpower.

Be careful if you’re transporting these anywhere – once cooled I cut mine and put them in a tupperware to take to work. Big mistake! They all stuck together. They still tasted great but looked pretty rubbish in the end. Ah, well.

ย 

20140131-112027.jpg

20140131-112046.jpg

20140131-112054.jpg

20140131-112111.jpg

20140131-112102.jpg

20140131-112119.jpg

20140131-112125.jpg

20140131-112141.jpg<

20140131-112154.jpg

20140131-112134.jpg

20140131-112205.jpg

Top Of The Blogs

20140128-212037.jpg

Since I’ve been writing this blog, I’ve had quite a lot of people, particularly friends and family, ask me which other blogs I would recommend. So I thought it’d be good to give you a list of my favourite blogs.

Before I started writing Eat Sleep Bake Repeat, I’d been follwing blogs for about a year. I use Bloglovin’ to keep up to date; if you don’t use it, and you follow blogs, you should. It’s an app which you can download onto your smartphone which tells you each time your favourite blogs publish a new post – you’ll never miss out on a post again, and won’t get millions of emails every time individual blogs update.

So I’d been enjoying these blogs and finally decided that it was time to get in there and start my own. These are the ones which inspired me to go for it, and which I love to read

<p>A Beautiful Mess

This is a really popular blog, written by two sisters in the USA. It’s really varied with recipes, DIY, craft projects, fashion and lifestyle. It’s got a lot of followers (they’ve even got their own app) and have some really interesting features on there.

Hannahhotcakes

Hannah is actually a friend of a friend and hers was the first ever blog I started following. It’s very down to earth and personal. I love hearing about her life and seeing the recipes she posts – I’ve made a few of them and they always turn out well. It’s nice to read a blog by someone “normal” and not one of the career bloggers who just do it for money!

Cake vs Scales

I feel like this blog is made for me a little bit – Katie is really healthy (I try to be but it doesn’t always happen) and she gives loads of motivational tips which can boost me when I can’t be bothered! Saying that, she isn’t a super health freak and does tell us about her failings, which make her easy to relate to. Keep it up Katie ๐Ÿ™‚

Tinned Tomatoes

This is a veggie blog with some great ideas and recipes on it. Being a vegetarian myself it’s always nice to have more ideas! Jacqueline, who writes the blog, was so friendly when I set up my own and gave me some really good advice. Check this blog out for easy to follow and delicious food ideas.

Baggy Bulldogs

I just had to put this one in here. You may have seen pictures of Lola, our British Bulldog, on this blog. I completely love her. Baggy Bulldogs is a blog totally devoted to funny and cute pictures and videos of this awesome breed! One day, maybe, Lola might get her own post ๐Ÿ˜‰

Sally’s Baking Addiction

OMG, the most awesome baking ideas and recipes. Sally is a creative genius when it comes to baking (how she isn’t the size of a house I’ll never understand). Plus her photography skills are MAAAAAD. I want my blog to be like hers! She even has her own cookbook coming out soon – how cool is that?!

A Thrifty Mrs

I LOVE LOVE LOVE a bargain, and this blog has plenty of them. There are freebies, money saving tips and sales alerts on this blog. I wouldn’t be without it and over the past year I’ve saved a fair amount by reading this blog.

Lily Pebbles

Again, a really popular blog which is pretty much all based around beauty and fashion. Some of her posts are a bit high-end for me, but she has some really great finds and tips and I’ve definitely learnt more about beauty since following her blog.

Miss Budget Beauty

As the name suggests, she writes a lot more about budget beauty products, which suits me down to the ground. I find her blog so useful, especially around Christmas time when she did some great posts about gifts to give in a certain price range.

Scarletscorchdroppers

I’ve only been following this blog for a couple of days but it has already made its way to my top ten. A fab baking blog filled with lots of the best looking cakes ever – you will want to make every single recipe, I’m telling you now. Read this blog at your peril, it will make you fat, and poor (from the amount you’ll spend on ingredients!).

So there we go, those are my top ten! What are your favourite blogs? What do you think of these?

Mary Berry’s Baking Bible Recipe #2 – Carrot Cake

20140126-214755.jpg

I don’t know about you, but whenever I get a new cookbook, I get a little bit over-excited and want to bake EVERYTHING, NOW. And I would as well, but unfortunately there are little things like MONEY and WORK which get in the way. Pah, who needs those anyway?!

As the title of this post suggests, said cookbook would be Mary Berry’s Baking Bible. I talked about this in an earlier post, but suffice to say I still love it. For those of you who are just starting out in baking it’s a must. GO OUT AND BUY IY NOW. Or at least go on Amazon… That way you won’t need to leave the comfort of your sofa!

I promised a friend I would make him a cake and asked if he had any requests. He asked for carrot cake. I didn’t need to think twice about where to look for such a classic recipe and as soon as I got home I checked my baking cupboard to make sure I had walnuts. Does anyone else get too excited about the thought of baking to check they have all of the required ingredients, only to get to a critical point and realise you’re missing something which you just can’t do without? Cue made rush to the shops/neighbours/24 hour garage. Yup, that’s me, and I don’t know why but I ALWAYS forget the walnuts in carrot cake.

So, walnuts, check.

Onto the recipe.

ย 

Ingredients

For the cake

2 ripe bananas

225g self-raising flour

2 level teaspoons baking powder

150g light brown sugar

50g chopped walnuts

100g grated carrots

2 large eggs

150ml sunflower oil

For the topping

175g soft cheese

50g butter, softened

200g icing sugar, sifted (MB’s recipe calls for 100g but I found that the mixture was too runny)

A few drops of vanilla extract

Walnut halves to decorate

ย 

Method

— Preheat the oven to 180 degrees Celsius. Grease and line a 20cm cake tin. I used a square silicone one (has anyone else used silicone bakeware? Saves on the greaseproof paper!).

— Mash your nanas. I used my KitchenAid on a medium level and the were goo in no time. Using the same bowl, chuck all of your remaining cake ingredients in. Just whack them all in ๐Ÿ™‚ Give it a good mix until all combined, and then tip into the prepared tin.

— Bake for between 50-60 minutes. Check your cake is cooked by… Actually, no, I’m not going to say it. You all know how to check whether your cake is cooked! Leave to cool in the tin for a few minutes, then turn it out onto a copoling rack and leave to cool completely.

— For the topping, put all of the ingredients (except the walnuts)ย into a bowl andย mix until just combined. Don’t mix it for too long because the cream cheese can loosen and become runny. I did this and my topping ended up as more of a glaze. It was still nice though ๐Ÿ™‚

— Decorate with the walnuts, then tuck in!

It is quite a stodgy carrot cake, but I enjoyed it and it certainly didn’t last long!

What to make next from the baking bible?!

20140126-215134.jpg

20140126-215154.jpg

20140126-215205.jpg

20140126-215213.jpg

That Was The Week That Was #8

It’s been a week of highs and lows this week, but overall it’s been a good one. I reached 100 followers on this blog (yay, and thank you!), had a lovely date night with the boy, and had some great news at work. We also went to see The Wolf Of Wall Street – this film is freaking awesome – if you only see one film this month, see this one.
My Sunday TWTWTW feature seems to get the most ‘likes’ of all of my posts and your comments tell me you’re enjoying it, so here are some more photos from this week.

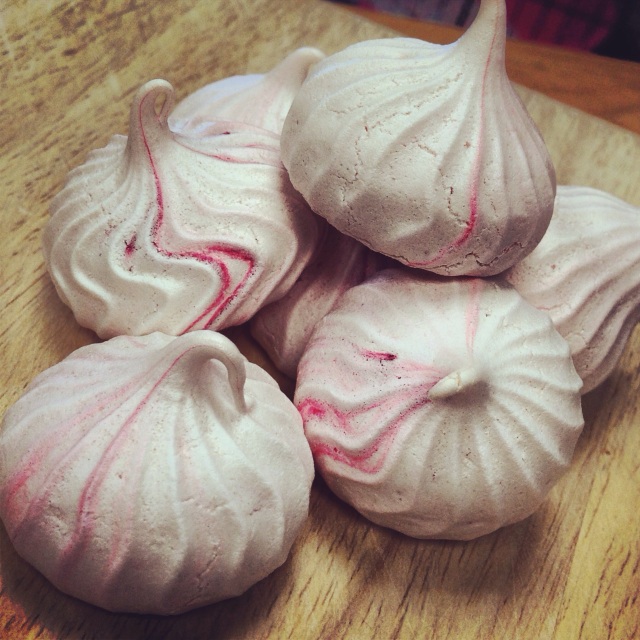
My first attempt at meringues from the Meringue Girls cookbook – Blog post coming soon!

20140125-225623.jpg

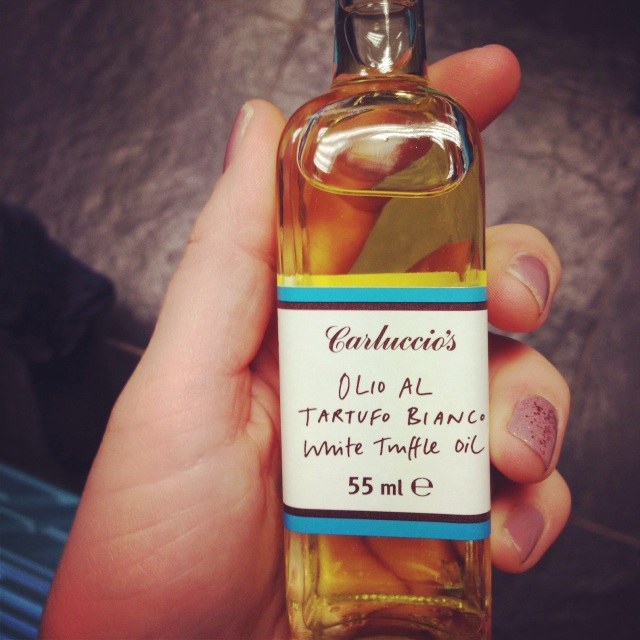
Is there anything more decadent or luxurious than truffle oil?

20140125-225937.jpg

Can’t… Resist… Allsorts…

20140125-230037.jpg

Horsey kisses – love this special boy xmwahx

20140125-230140.jpg

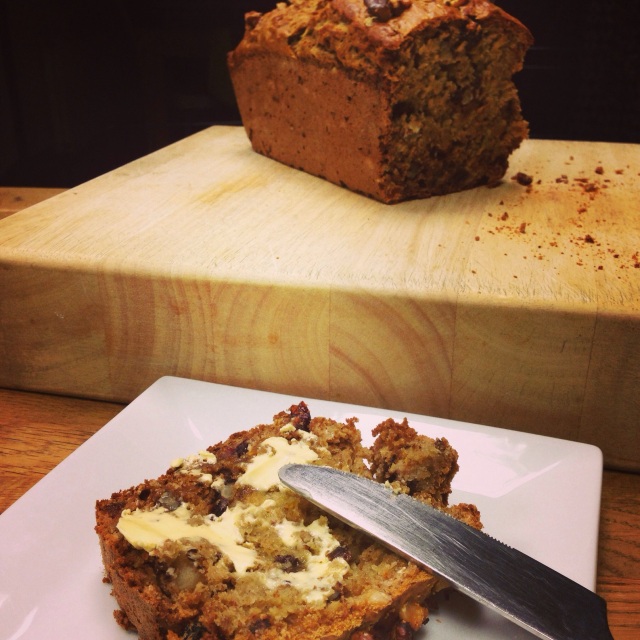
Homemade healthy apple loaf cake

20140125-230238.jpg

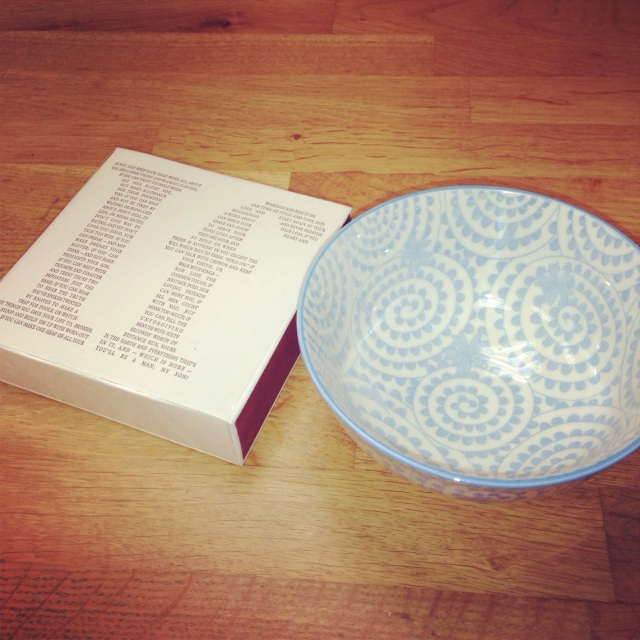
Mini Oliver Bonas haul – possibly my favourite shop ever!

20140125-230705.jpg

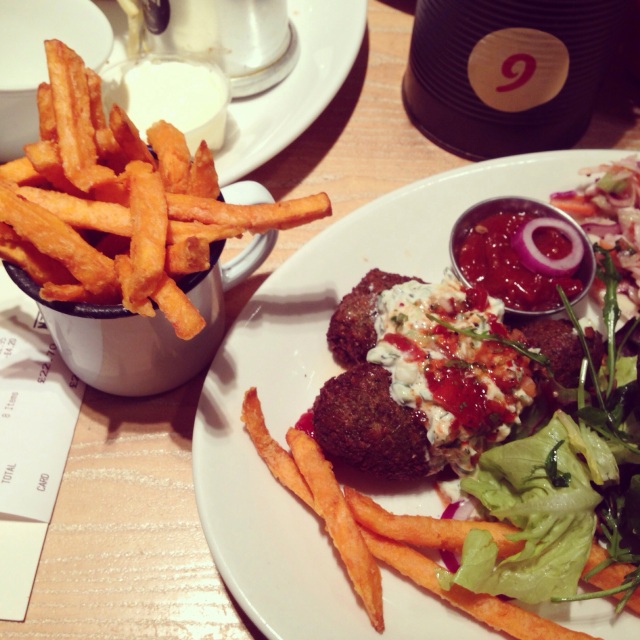
Gourmet Burger Kitchen noms

20140125-232309.jpg

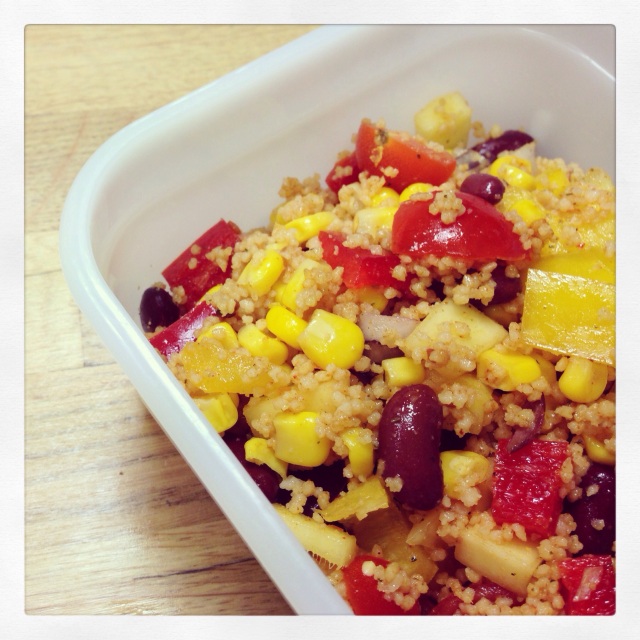
Homemade Mexican Salad. It’ll blow your socks off!

20140125-232411.jpg

Lola hearts sweeties

20140125-232505.jpg

Skiing – Hotel or Chalet?

20140123-193911.jpg

I’ll apologise now for the length of this post. It’s meant to help advise those who are planning on a ski holiday and don’t know whether to go for a hotel or a chalet. It’s a little wordy but I hope it helps!

I’ve been skiing around 7 times now and until this year I’ve always stayed in hotels. For those of you who’ve been skiing before, you’ll know it can get REALLY expensive. You can expect to budget around ยฃ1000 all in for a week skiing – ouch.

If you’re staying in a hotel, you can definitely expect to spend closer to the higher end of that budget, if not above it. With our wedding to pay for this year, we wanted to go skiing but couldn’t afford the huge price tag of staying in a hotel.

Our friends were interested in going skiing with us, so we got researching and my friend found a deal through Ski France to stay in one of their chalets, Chalet Mongellaz in La Tania, France (in the ski area of the Three Valleys).

The following is my experience of staying in this particluar chalet. The price was very reasonable, at around ยฃ500. This included flights, accommodation, transfers and food. The food was a continental and cooked breakfast, afternoon tea (a freshly baked cake, french stick, jam and butter), canapes, a three course evening meal, cheese board and unlimited wine in the evening.

The price for all of this is fantastic; the transfers alone were around ยฃ100 per person. We didn’t need a lot for lunch because we had so much food for the rest of the day, and we only went out for one meal whilst we were there, so this meant that our spending money budget went right down. I think in total we spent less than ยฃ100 each for the whole week, on food, drink and general bits and pieces.

By comparison, when we’ve stayed in a hotel on a B&B basis I’ve had to budget a LOT more than this, purely for food and drink. It’s not uncommon to spend ยฃ50 per day on food and drink, so from this point of view we saved a lot of money. You can easily pay ยฃ500 just for a B&B hotel, without flights, transfers or food.

So, onto the actual experience itself. Because we were staying in a catered chalet, we had a lovely chalet host looking after us for the time we were there. Her name was Vari and she was 18. Her role was to do all the cooking, cleaning and generally look after us.

She did a fantastic job, especially as she had two vegetarians to contend with. At 18 there’s no way I would have had the skills or maturity to cope with her job. The chalet was well kept, tidy and clean, and, as chalets go, fairly modern. It states on the website that it’s a 4* chalet. I’m not sure whether I would agree with that. It’s nice enough but quite basic, and doesn’t have any wifi. It has a TV and DVD player, but considering that when you stay in a chalet you’re in a lot of the time, it would have been nice to have some DVDs and games provided.

My main issue with the chalet was lack of sleep. If you ever book a chalet, try to pre-book which room you’re going to have. Our chalet slept 10 people, and luckily they were all a bit older than us, so it wasn’t a young, rowdy crowd. Even so, you could hear EVERYTHING through the walls. Our room was on the same level as the dining area/kitchen/social area, which meant that even if we went to bed early, we couldn’t sleep as we could hear everyone else who was still up. It also meant that as soon as the chalet host got up in the morning, normally around 7am, we were woken up by her preparing breakfast. She wasn’t being particularly loud, but there was no getting away from it.

I am someone who needs their sleep, especially on a physically tiring trip such as skiing, so needless to say, I wasn’t happy with the lack of shut-eye.

My other main bug-bear was the food. Not the quality of it, but sometimes the quantity. It seemed that, along with our chalet host, there were sometimes up to 3 other hosts bunking down in our chalet – once we even found one asleep on the floor in the storage room! There were times when there wasn’t enough cereal, bread, yoghurt or juice for our breakfasts, and our chalet host admitted that these other people had eaten too much food, so there wasn’t enough left for us, the paying guests! I found this outrageous.

A general issue with staying in a chalet, any chalet, and you know this before you go, is that you’ll be sharing with people you don’t know. It’s pot luck who you get; we were so lucky that we had all middle aged professionals, who were good skiers and just wanted to get on with it. If you don’t mind who you stay with, that’s fine. But think carefully if you’re worried about staying with kids, rowdy groups of 18 year old etc.

Despite all of the above, I enjoyed my time in the chalet, and it’s definitely the cheapest way to ski. However, if I wanted to have a really nice holiday, or money wasn’t an issue, I would book a hotel for sure.

Here’s a quick overview of the main points…

Hotels
Pros
Generally better decor and facilities
Freedom to eat where you please
Quieter
More privacy, able to relax more
Cons
Normally much more expensive
Confined to your room
Less social

Chalets
Pros
Much cheaper – food and wine included
Advantage of chalet host and resort rep to assist with buying ski passes, organising ski school etc
Our chalet was ski-in, ski-out, fantastic!
Cons
Concern of who you may be sharing with
Noise
Not as nice facilities as hotels, rooms small and no wifi
Sometimes unable to relax due to having strangers around you

20140123-193724.jpg

20140123-193748.jpg

20140123-193804.jpg

20140123-193855.jpg

PS… Caption competition?!

20140123-194003.jpg

The One Hundred Club!!

20140122-160157.jpg

This is just a little post to say a big THANK YOU! I’ve hit 100 followers and I’m so grateful for each and every one of you.

When I first started writing this blog only two months ago I didn’t really think anybody would read it, so to have reached one hundred follwers feels like a massive achievement.

I hope you’re enjoying it, and I welcome any feedback from you – I love reading your comments so keep ’em coming!

If you have any post suggestions or recipe requests, I’d love to hear about them. You can contact me on here or email me at meow_2u@hotmail.com.

Kim x

Let’s Stay Together – WI. RED January Meeting

20140121-211712.jpg

I approached this month’s WI. RED meeting with interest. The plan was to have motivational and inspirational speech from Denise Neale Gordon, a relationship coach, followed by an input from One Billion Rising, a worldwide charity working together to end violence against women and girls.

Although I’m getting married this year and am very happy in my relationship, I thought that hearing from an expert couldn’t do any harm! Denise started off telling us her story, about how her marriage almost broke down years ago, and what she did to repair and improve it.

Her core message was: Learn about what your partner needs, and provide it!

I think a few people may have found this to possibly be a little traditional, and all about just pleasing the man, but I think I understood what Denise was trying to say. Essentially, we should treat people in the way we would like to be treated; with respect, fairness and compromise. Find out what your partner wants, and try to provide it for them. By doing something nice, maybe they will be happier and in turn do something nice for you, whether that be just making more of an effort, hoovering the house or telling you that you look nice! The message I got was that it’s all a circle. In a way, like karma. Send something good out and good will return.

Something else which stuck in my head was a comment another member made. She said that we think about the ways in which WE would like to be shown love, and then act in these ways, or do these things for our partners, trying to show them that we love them. But the way in which WE want to be loved may be different to how our partners may want to be treated. So, for example, if he took me out for a nice meal as a surprise and treated me, I would love that and it would be one way for him to show me that he loves me. But he’s not that bothered about going for meals, and maybe he would prefer for me to cook him a nice meal; that would mean more to him and show him that I love him.

So, in essence, don’t just ASSUME you know what your partner wants, ASK them!

We also had some ladies from Bristol Rise, the Bristol branch of One Billion Rising, who are a world-wide charity, working together to end violence towards women and girls. They talked to us for a while about their work and fundraising and told us about a march which will be taking place in Bristol on 14th February 2013, where there will be an organised dance/flash mob to raise awareness for the cause. You can find out more about them

We had some lovely treats on the tea and cake stall, including stollen bites and the perfect Lemon Drizzle Cake, both made by two of our committee members, and a fabulous Cappuccino Cake, which was made by Ceri Dunning, one of our members. She couldn’t make the meeting itself but trekked out in the dark and the rain to give us her cake! What a fab lady.

As of next month, we will have a new temporary WI President, Nikki Buglass, as Louise will be off, hopefully having had her baby!

Next month’s meeting will have a paper craft theme, where we will be learning to make flowers out of paper plates. I’ve seen these before and can’t wait to give them a go – think Pinterest, weddings, shabby chic!

If you’d like to know more about our WI or how to join, you can look at the Facebook page or email us at hellowired@yahoo.co.uk.

Until next month, ladies!

x

20140121-211736.jpg

20140121-211749.jpg

20140121-211804.jpg

20140121-211820.jpg

20140121-211829.jpg

20140121-211843.jpg

Healthy Snack – Spicy Roasted Chickpeas

20140119-155232.jpg

I’m trying to be good and eat better for the New Year. Really, I am. But I got so many nice foodie treats for Christmas and my birthday – what ya gonna do?! My theory is, eat them, get them out of the house, then start a fresh.

I don’t know about you guys, but my downfall is snacking in the evening. I’ll have my dinner, I’ll be full. I won’t need anymore food. But I’ve got into this awful habit of snacking. On anything and everything. Some nights it’ll be sweets and chocolate, some nights it’ll be savoury. I was searching t’tinterweb for ideas for something healthy to snack on and I came up with this – spicy roasted chickpeas.

Savoury, spicy and crunchy. Let’s be honest, they’re not going to beat a nice big bag of Walkers Sensations, but they taste damn good, take two seconds to throw together and will satisfy your snacking habits. Also, I always have a spare can or two of chickpeas in the cupboard (I find them a bit like cans of chopped tomatoes – I use them up and don’t remember buying anymore but they just seem to multiply and re-appear!). This is great because it means if I’m feeling fanciful I can whip a batch up and snack away!

You can eat these as they are, or try adding a handful to your salad to make it a bit more interesting and add texture. The great thing about this recipe is that you can really mix things up. Using the same quantities, you can substitute whatever spices you have in your spice rack. I’ve even seen a cinnamon sugar version! Maybe it defeats the object of healthy… But it tastes nice ๐Ÿ™‚

ย 

Ingredients

1 400g can chickpeas, drained

1 tbsp oil, eg vegetable, sunflower – whatever you have in

1 tsp chilli powder

1/2 tsp ground cumin

1/2 tsp paprika

ย 

Method

— Preheat the oven to 200 degrees Celsius. Drain your chickpeas, rinse thoroughly with cold water and dry using a paper or kitchen towel. Try to make them as dry as possible. The dryer they are, the crunchier they’ll become.

20140119-155240.jpg

— Once dry, pour them into a bowl and add the oil and spices, until everything is well coated. Tip out onto a baking tray. Ensure that the chickpeas are spread out in one layer so that they have room to roast properly.

20140119-155423.jpg

— Roast in the oven for 30 minutes, taking the tray out at ten minute intervals to shake, to make sure they are evenly baked.

— Once the 30 minutes is up, turn the oven off, open the door slightly and leave the the tray in the oven to cool.

Once cooled, help yourself! Be warned – they don’t last very long.

Have you tried these? What flavour combinations would you like to try?

That Was The Week That Was #7

It was my first week back to work this week, after a long time off over Christmas. It’s been a really busy week so far! Whilst I was skiing I really missed baking (that’s a bit sad, isn’t it!), so this week, along with work, I’ve kept myself busy making cake pops and a carrot cake. I’m also off work today so am planning a few bakes to keep me entertained! I’ll be sharing these recipes with you over the next couple of weeks, along with more information on our recent skiing trip in case you’re looking to plan a winter holiday.

Here are some photos to give you an insight into my life this week.

Disaster cake flop…

20140118-203805.jpg

… Turned into yummy cake pops!

20140118-203541.jpg

My awesome Nan ๐Ÿ™‚

20140118-205632.jpg

Trying out another Mary Berry recipe, carrot cake

20140118-205727.jpg

Funny Lola

20140118-205811.jpg

Lakeland haul in preparation for meringue making

20140118-210106.jpg

Choccywoccydodah belated birthday pressie ๐Ÿ™‚

20140118-210215.jpg

Queen Mary’s Lemon Drizzle Traybake

20140113-185624.jpg

Before Christmas, my friends and I met up for our annual girl’s Christmas meal. We always do a Secret Santa, and this year I received some awesome presents: a two tier cake stand and Mary Berry’s Baking Bible cookbook. Mary Berry, you may or may not be aware, is my absolute heroine. I LOVE her, and anything Berry related. I’m slightly obsessed (although I hope in a nice-admiration-I-wish-you-were-my-nan kind of way, as opposed to slightly-scary-stalker way).

Seriously, I love this book. I’ve already spent hours reding through it and deciding what to bake and in what order. I’m considering a “Julie & Julia” style project working my way through the entire book – what do you think, shall I do it? My workmates could benefit from this greatly, but my waistline I fear may not…

So, I had a compulsion to bake. Do you ever get that? When you just have to bake SOMETHING? Anything? Most of the time it’s not even that I want to eat it, it’s the process. Baking for me is my relaxation and my therapy.

I searched through the book – I wanted to make something classic but tasty and what better than a Lemon Drizzle Cake? Mary Berry makes this as a tray bake, so I decided to do the same.

I’m not just saying this, but this cake was great. Light, lemony and sweet. The syrup for the topping was crunchy and thick, just how I like it.

This is me, baking Mary’s recipe, in my own words. But it’s definitely her recipe, I couldn’t take credit for such perfection! I thought I’d taken pictures of making this but I obviously forgot – Oops, sorry!

Ingredients

For the cake:

225g unsalted butter or Stork, softened
225g caster sugar
275g self raising flour
2 level tsp baking powder
4 large eggs
4 tbsp milk
Zest of 2 lemons

For the crunchy topping:

175g caster sugar
Juice of 2 lemons

Method

— Preheat the oven to 160 degrees Celsius. Line a 30x23cm tin with baking paper.

— Put all the cake ingredients into a bowl and mix until fully combined. I used my KitchenAid on a medium setting. Spoon the mixture into the prepared tin and level, then bake for around 35 minutes. The cake should be golden brown and springy to touch.

— Allow the cake to cool slightly in the tin. Mix the remaining sugar and lemon juice until it’s runny. Turn the cake out onto a wire rack, and place a plate underneath to catch any drips.

— Using a skewer or toothpick, poke holes all over the top of the cake to allow the drizzle to penetrate right through. Then spoon the drizzle mixture over the cake and leave to cool completely.

Once cooled, cut into slices and enjoy ๐Ÿ™‚ This cake is wonderfully light and moist, and will keep well in an airtight container for at least 3 days, although it didn’t last that long in our house!

If you’re interested in the book, you can buy it here. I’d highly recommend it for both baking newbies and the more experienced cook – there is something for everyone in there.

20140113-185735.jpg

20140113-185814.jpg